Showing posts with label photography tips. Show all posts

Tuesday, September 23, 2014

Product Photography: Adjusting the White Balance

Between my blog and my Etsy shop, I take hundreds of pictures of my craft projects and products every month. I am continually looking for ways to improve my own photos because I know that quality photos attract customers and help me tell my crafting story.

You don't need to be a professional photographer, or have a fancy camera, to take decent pictures. There are a few simple things that anyone can do with a basic digital point and shoot camera. For example, taking your camera off of the "auto" setting and experimenting with different features, especially the white balance, can have a huge impact on your photos.

I adjust the white balance on my camera every time I shoot a series of photos. If you have ever noticed that your photos have a yellowish or bluish hue, your camera's white balance setting is probably to blame.

Here's how to show your product's true colors.


Most newer cameras have at least five white balance settings besides auto. They are sunny, cloudy, tungsten, fluorescent and daylight fluorescent.

Since a picture is worth a thousand words, let me show you how the white balance settings can change a photo. We'll start with a roll up artists case that I just made for my daughter. I took this picture inside with a white background and natural lighting from a window in the room. All of my camera settings remained the same except for the white balance. From left to right, my white balance settings were sunny, cloudy, tungsten, fluorescent, daylight fluorescent.

Learn how adjusting the white balance on your camera can impact your product photos
Click on the photo strip for a larger view

In this example the fluorescent setting provided a photo where the colors appear closest to the actual item color.

Now let's go outside and look at the fairy garden by my front door. Again, the only thing I adjusted in each shot is the white balance setting.

Learn how adjusting the white balance on your camera can impact your product photos
Click on the photo strip for a larger view

Even though I was taking the picture in the shade, the sunny setting produced the best results.

Here are a couple more examples, a hibiscus in my backyard

Learn how adjusting the white balance on your camera can impact your product photos
Click on the photo strip for a larger view

and one of the paintings hanging in my studio.

Learn how adjusting the white balance on your camera can impact your product photos
Click on the photo strip for a larger view


As you can see, the appropriate white balance setting depends greatly on your lighting conditions.

Don't be afraid to switch off the auto setting on your camera. It only takes a few minutes to experiment and see which white balance setting works best for your situation.


PRESENTED TO YOU BY OUR LEADER :


My name is Ellen and I LOVE to design and create things. I find it deeply satisfying to start with nothing more than an idea and finish with a tangible, beautiful, functional piece of work. I enjoy learning new techniques that I can incorporate into my creations. I practice a variety of different art forms, but find I always have at least one knit, crochet or sewing project in progress.

Sunday, June 8, 2014

BEST IN SHOW Game - What Makes an Item POP?

A little background info on my BEST IN SHOW game - I was making a treasury one day, and I love to come up with catchy themes.  I have 3 poodles, and when cuddling with them, I came up with Best In Show.  Great theme for a treasury, I thought... and I made one.  But, the idea stuck with me - and I thought, this would make a great game!


A game where someone looks through your store, and selects what they believe is your Best In Show item.  But, it doesn't stop there.  They tell you WHY they think it is your best item, so you get feedback that you can put to good use in marketing future items.  And, it may be different for each person that looks through your shop, but that is the great thing about it.  You get all of these little tidbits of information that help you grow and develop as a shop owner.  Plus, we all help promote each other's items - but, that is the simple joy of being on the SPS Team!

Here are a few quotes from the BEST IN SHOW game that answer the question "What Makes an Item POP?"


Here is a painting by EchidnaArtandCards.
It was selected as Best in Show.

"This piece jumped right out at me. I love everything about it. I think it is very dynamic and organic. The colors are vibrant. I love the blending of the colors. The shapes are graceful. The texture makes me want to run my fingers over it.  I love that it is a miniature and that I could really and truly own it! I’d love for it to be the centerpiece of a miniature art gallery, my miniature art gallery!   I really like this thread/game."


- Diana from CharmedBaublesNBeads


Here is another example:


These "Papaya & Tangerine" bracelets are by PeppermintPigs. 


"I went to Liz's store PeppermintPigs. It was like a trip to the carnival. You, Liz, have fun with your store - and those of us who visit feel it. I was like a kid in a candy store soaking it all in! I picked this item as my favorite, because of how you presented it. From the fruity names you gave the colors, to the fruit bowl you staged the bracelets in for the picture. Like I said, fun!"

- Paula from BridgetsCollection


And finally...

Green and Navy Blue Tote Bag by BerkshireCollections


"The workmanship and care shows in all the totes and purses in this shop.  I love the colour scheme on this particular bag. It's very spring like.  Also, I love the use of the cluster of buttons to show- case the centre of the of the flower.   I think any one would love this bag as a beach tote or as a casual around town purse!"


- Rose from AllYouNeedIsBeads


When playing the BEST IN SHOW game, shop owners learn what is the "IT" factor for their items.  Is it the photograph of the item? Is it the uniqueness? Is it how it is made? Is it an item that you feel will be very popular?  Do you somehow connect with the item by the way the shop owner makes you feel when you look at it?

From workmanship, to photography, to causing an emotional connection with your item through presentation and/or description... there is so much to learn as a shop owner.

Come play BEST IN SHOW :
https://www.etsy.com/teams/12274/strategic-promotion-for-success-team/discuss/14470982/

 Let's grow together!


PRESENTED TO YOU BY OUR LEADER :

My name is Paula. My shop, BridgetsCollection, carries a collection of items (thus the title) that are all of interest to me. I enjoy going to estate sales and thrift shops to find that special vintage item. I love mid-century modern, I love Pyrex, and I LOVE the hunt! I enjoy finding a used item and up-cycling it to give it a new purpose and a new life. I enjoy crafting in many forms, and never feel the need to limit myself to a certain craft or media. I grab a morning tea, decide what interests me, and I go with my heart's desire of that day. I hope you enjoy my collection!


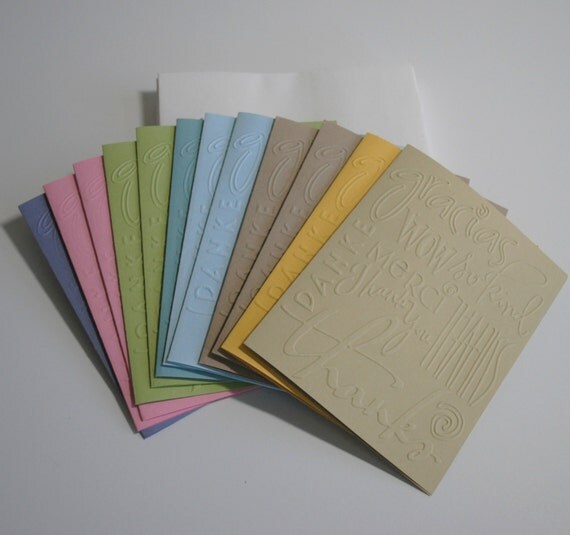
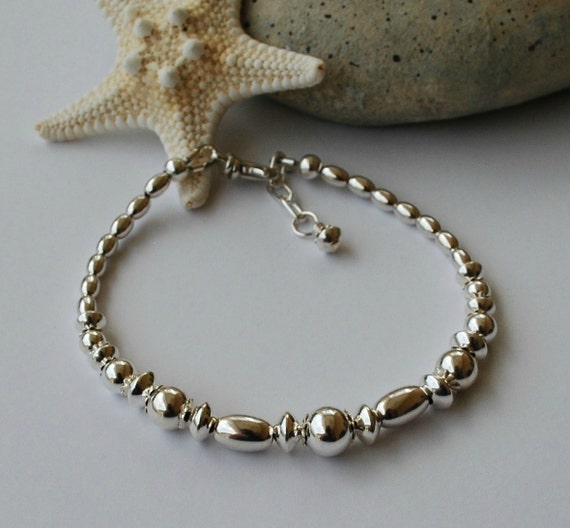
Thank You Cards - Set of 12 -Bright, Beautiful Sterling Silver Adjustable Bracelet


Follow Paula on the different social media platforms:
Pinterest: www.pinterest.com/paulabrod
Facebook: www.facebook.com/BridgetsCollection

Sunday, March 2, 2014

Photo Editing Basics

No matter what you are selling on Etsy, you want to make a great first impression with your item photos so people will stop by your shop to take a closer look at your products. After you stage your photo shoot and take pictures of your items you may be anxious to get your items listed right away. However investing a little bit of time to edit your pictures can help you get noticed.

The first thing you'll need is photo editing software. There are many great programs available in just about every price range. If you are new to photo editing and want a program that's simple, I recommend PhotoScape. Not only is it easy to use, it's free! (You can learn more about PhotoScape and how to download it on their web site www.photoscape.org.)


The editor in PhotoScape has a lot of useful features. You can do everything from resizing your pictures, to adjusting the colors. Let me show you a couple of quick ways you can do to make your good photos great!


Many thanks to Meirah for providing all of the unedited product photos for this tutorial. You can find these lovely fused glass creations and many more in her shop Home for Glass Lovers.


White Balance

Sometimes the whites in your photo don't look white but may have a bluish hue. It's easy to correct in PhotoScape by clicking the arrow next to the "Bright, Color" button and selecting "White Balance" from the pop up menu. Then you just click on an area of the background that should appear white. Look at the difference created by three mouse clicks.


Blurred Backgrounds

You may use a non-white background in your photos to add texture or evoke a mood. However, you don't want the background to take the focus away from your item. By clicking the "Tools" tab, you can choose an "Effects Brush" that allows you to paint over your photo and blur certain sections. If your photo appears a little darker than you'd like you can also click on the "Bright, Color" button to brighten things up a bit.


Bloom

If your photo has harsh shadows that detract from your item, the "Bloom" button creates an effect that not only brightens the picture but also softens the shadows.


Cropping and Resizing

Etsy allows you to upload five product photos for each listing. Of course your main picture will show the complete item, but it may also be helpful to crop a certain section of your picture so that you can highlight the details of your item. In this case I cropped the main picture of the jewelry set into two smaller photos, one of the necklace and one of the earrings.


Finally, if you are finding that your photos take a long time to upload when you are listing them, you may want to resize them. The recommended width of your pictures is 800-1000 pixels wide.

As you can see, photo editing doesn't have to be difficult. Each of the effects shown took less than two minutes to create and are an easy way to help you make a great first impression with your items!


* * * * * * * * * * * * * * * * * *

Check out some of our previous articles on photography :


PRESENTED TO YOU BY OUR LEADER :


My name is Ellen and I LOVE to design and create things. I find it deeply satisfying to start with nothing more than an idea and finish with a tangible, beautiful, functional piece of work. I enjoy learning new techniques that I can incorporate into my creations. I practice a variety of different art forms, but find I always have at least one knit, crochet or sewing project in progress.


Saturday, February 22, 2014

Improve Your Photos

As you know, taking stunning pictures is one of the keys to success on Etsy. 
Here are some interesting and effective tricks to improve your photos!

Your product is the focus!

In this section we are going to discuss “staging” your items for your photo shoot. The first thing to consider is the background. No matter what your product is, your product is the most important and first thing you want your customer to see. (I will note here that sometimes the creator wants an artistic look that isn’t necessarily focused on the product; however, we are not going to tackle that here. There has been much discussion between Etsians about the use of a white background for photos. Many people feel that Etsy seems to favor white as the background of choice for treasuries that gain the front page. That may or may not be true, but a crisp, clean, uncluttered background is what you want to achieve. Remember the star of this photo shoot is your product.

Umbrellafant

Consider the background

Don’t let the texture or color overwhelm your product. Fuzzy rugs, fluffy bedspreads, shiny and/or wrinkled fabric don’t look professional or accent your product. Make sure your background color complements your product colors.  You don’t want the background to compete for attention. Try to choose a color or look for your background that puts your product in the best light. That might mean that if your item is very colorful or intricate that a solid color background is best.

Umbrellafant

There are many things to use for a background, lots of small items can be photographed on a piece of tile, stone, barn wood, or scrap booking paper, (I like to look for white papers with different textures)
If you have a larger item, hang a stiff canvas cloth behind it, even a blank wall that doesn’t compete will work. It’s okay to take pictures outside if your item is the focus in the forefront and the objects in the background fade away.

Don’t be afraid to look at other shops and get ideas!

Beechtree


Represent your work!

 If you have an unusual item, perhaps you want to add something in the picture to help reference it. An example might be if you make cake toppers you might want to have a cake in the photo as well as your product. Remember you have 5 photos to use, choose the most informative photo for the feature photo. Think of it as having 5 photos to tell the story of your product. Remember when a person is shopping in a brick and mortar store, they will look at the top, bottom, inside, closure, size, seams, workmanship, etc. Make sure you use all 5 photos to sell the critical components of your item.

Evoke a Mood 

Some Etsy sellers want to evoke a mood with their photos to help sell their product. An example might be if you are selling beach glass jewelry, besides having good close-ups, use of sea shells for props will look great and remind the shopper of a day at the beach. Colors that are considered to be “beach” colors such as pastel blues and greens would be a good choice, Vintage sellers often want to set up photos to look like a museum display which evokes antiquity with their product the focus. Showing a product in use always to help tell the story.

Thread Design Studio

What kind of mood are you trying to set? Choose props that tell that story!

Foxberry Hill

Beechtree

Cocodollz


Use of White Space

White space, many times referred to as negative space, is the portion of a photo that is left blank, the empty space in a photo. It doesn't have to be white to be considered as empty space. Negative space will draw your viewer’s attention to a product. When you separate your subject from a cluttered background you are simplifying your image, thereby making it more compelling.

Whisper Of The Pipil


Get chosen for treasuries!

 Treasuries are a great way to be featured and get your products noticed. If you have great photos, not only will you have increased sales but you will find your products featured more by treasury makers. A treasury maker is looking for beautiful, clear artistic photos. If you have lots of text on your photos like clearance, sale, trademarks, etc. chances are those photos will not be chosen.


In Closing

When a buyer sees professional looking photos that look like thought and care has been taken to best display the product, they get the message that the product must be made with great thought and care as well.

* * * * * * *

Take a look at some of our previous articles about photography :


PRESENTED TO YOU BY OUR LEADER: 

Hi, my name is Tara and I am a recently retired Speech/Language Pathologist with 2 grown children and one grandson (and another on the way!) I share my home with my husband and 2 big dogs. 

I have been passionate about creating in some form or another all of my life. Our family has always enjoyed our time at Lake Michigan and love to collect Petoskey stones and other fossils and stones. When I discovered jewelry making I finally found my niche for creating beautiful pieces that I can share with others. Each piece I create starts with the stones themselves and then it just seems to flow from there. I have collected gemstones and beads from everywhere I travel and always can’t wait to get started with the new treasures. 

I hope you enjoy my shop Beechtree and will find a piece that speaks to you and brings much joy. 


Etsy: www.etsy.com/shop/Beechtree
Website : www.beechtreedesigns.com
Facebook : www.facebook.com/BeechtreeDesigns
Pinterest : www.pinterest.com/dalgat


Tuesday, October 22, 2013

How To Take Beautiful Photos Of Your Handmade Items With A Lightbox ! - Photography Tips DIY Tutorial

Great photos are one of the most important things to get right if you sell online.

Your photographs are your virtual shop window: If they are not light, bright and eye-catching then often buyers will surf right past your store without even noticing your work.

Really beautiful photographs will bring buyers through your virtual door and keep them there long enough to remember your creations.

These photography tips are designed to help you make your photographs look bright, eye catching and professional and you don't need to have an expensive camera to do this!

This tutorial comes in two parts: 1) How to make a Lightbox and 2) How to edit your photos to make them pop! I use both processes for all of my photographs.

Part 1: How To Make A Lightbox

These tips are one way of taking great photos, but they are certainly not the only way. I hope that you will be able to use this tutorial as a starting point and gain the confidence to make photographs with your own style.


First select a box that is the right size for what you want to photograph. For small items like jewelery a box about 30cm wide or 1 foot is good, although if you want to photograph larger items you will need a larger box.

Cut out the top of the box and the front, leaving a bar across the top to help your box keep it's shape.

Line your box with white paper, making a curve with paper in the back horizontal corner so that it won't show up in your background.

Make sure you put white paper on the sides too, this will help to bounce the light around even more and make your photographs really bright.

To avoid any lines in your photographs, use a large piece of paper for your backdrop, I love to have a white background so I am using a piece of A3 white card, but you can use any color you like. You can also use fabric if you prefer.

Stick or pin your background in place, again making a curve in the horizontal corner.

Your light source should be 2 adjustable lamps with daylight light bulbs, 100watts will get a great result. Daylight light bulbs are best because the colors in your photographs will be more accurate than if you use a regular yellowish bulb.

Daylight light bulbs look bluish when they are not on. You can get daylight light bulbs from any good electrical store, some art supply stores also stock them as painters prefer to use them too.


Arrange your lamps on either side of your light box, if the stands poke under your box -as they do in mine - then stand your box on some books to make it flat. Some people prefer to just use one lamp, but I find using 2 will eliminate all shadows and shows up the details on your work much better.

As you can see, when the bulbs are on the light bounces around in the box in all directions! Perfect for taking bright photographs.

If you have a tripod for your camera then set it up in front of your light box, if you don't have a tripod then add one to your Christmas list! For now you can stand your camera on something to balance it.

The reason for the tripod is that you don't want to be using the flash on your camera. If you turn off the flash on some cameras then any photographs taken with the camera in your hands will look shaky, the tripod will keep it stable and make your photos nice and clear.


Finally your light box is ready! Place your items in your light box, switch on your lamps, arrange your camera (remember to switch off your flash) and take some photographs!

Every camera is different, some of you may find that you are happy with the photos you get just from the light box. But if you are like me you will still want to make them brighter.

Part 2 explains how to do this... Join me next time !


PRESENTED TO YOU BY OUR LOVELY LEADER: 

My name is Anna Gilhespy. I have been a successful seller on Etsy for 6 years. My passion is helping other Etsy sellers achieve success with their shops by sharing my experience and knowledge about what works (and what doesn't) with everything Etsy. I have a particular interest in social media marketing and helping small businesses stand on their own two feet.


Friday, October 4, 2013

5 Tips For Expanding Your Etsy Business Into Local Galleries

Are you looking to market your Etsy business outside of Etsy and into local galleries? If so, check out these awesome tips to keep you on your toes and in picture perfect shape with your gallery applications. Judy is a member of the jury committee of the Walpole Artisans Cooperative Gallery. :-)


"Bringing work to galleries for review can be intimidating. I know I take any rejection of my work very personally. I'm on the jury committee of the Walpole Artisans Cooperative Gallery and see many artists who hurt their chances of acceptance by their presentations. So I thought I would share a few tips:

1. Gallery Policies - Check out the gallery or shop well. Does your work fit with the work shown? Is [it] redundant with a lot of the work there. You need a space with a similar aesthetic to yours but a space where your work will be unique and add to the blend.

Find out the gallery's policies both for submitting work and for commission. Is the commission so high that it would make your work too expensive to sell? If there is a process for submitting work follow it carefully.

Be confident and proud of your work...
2. Confidence - Be confident and proud of your work, or at least act like you are! I have had artists come in and ask ME which things I thought were good, even criticizing their own work. This is NOT the time for a critique. I am not going to want your work if you don't like it yourself. If you're enthusiastic [it] is contagious.

3. Porfolio - Bring in a current, cohesive body of work. I want to know what you are doing now, I am not looking for a hodgepodge of work you've done over the past twenty years. Show me one or two strong series.

4. Presentation - Presentation is very important. At our gallery we want to see the art ready for sale, framed, on jewelry displays, tagged and priced.

We recently had an artist come in with necklaces in plastic baggies, expensive necklaces she was asking $600 and more for. We were really shocked that she brought them in in baggies. She was not caring for or respecting her work. Some galleries and shops initially prefer a book of photographs - it should be beautiful and elegant.

If the gallery want a disc of work, provide that but also some hard copies to wet their appetite. If they ask for an artist statement and/or resume provide these. Even if you have little to add to a resume prepare something that shows your history with the medium.

5. Patience - Be polite of course and don't call and ask for updates, the process can be slow. If you are not accepted don't make a fuss or argue about it. We have accepted people who have applied a second time but those who were hard to deal with are remembered, we know we don't want to work with them!

I hope this helps. Applying to a gallery can be scary, everyone gets rejected at times. But a local gallery can be a great source of income and artistic support." 

"If at first you don't succeed, try try again." - Proverb


Meet Our Guest Blogger Judy from  Judy Stalus :

I live on fifty acres of beautiful gardens, fields and woodlands in Walpole, New Hampshire with my husband and daughter Despite the harsh climate of northern New England I have flowers in blossom from March through November.


I grow hundreds of varieties but have a special love of tulips, iris, peonies and poppies. I have iris in bloom for many months from the tiny iris reticulata and iris cristata of early spring to the summer blooms of bearded, Louisiana, Japanese and Siberian iris.


These gardens and flowers are the basis for most of my current photography. I photograph flowers in the garden, in the house, from afar and very close through every season.


Thank You sooo much, Judy for having shared your experience and fabulous tips with us. Applying to and getting your work accepted by galleries can indeed be a long and anxious journey. We hope Judy's tips will give our artisan friends a boost of confidence to persevere :-)

Visit Judy's Etsy shops for more inspiration :

www.etsy.com/shop/Judy Stalus

www.etsy.com/shop/beadedwire

Pinterest:
www.pinterest.com/blackiris

Spread some SPST love and support your fellow Teammies :-)

If you would like to share additional tips or your professional experience applying to or working with local galleries and/or craft shows, we want to hear from you!!!!! Post a comment with your Etsy shop or website and we'll contact you for a possible feature on our Team Blog :-)